
Learn how to plan missions and upload them to the drone.
Learning how to plan missions efficiently in QGroundControl will help you maximize your productivity with Discovery 2!
Walkthrough of QGC Mission Planning (Video)
Written Instructions
Note: We recommend using version 4.0.10 for QGroundControl on your computer. This is the same version that we use on our Herelink controller for the drone. This will help the compatibility between your Personal Computer, the Discovery 2 drone, and Herelink Controller.
Note: The resume mission function in QGroundControl is not currently compatible with Discovery 2. This is why we plan in 14 minute chunks that the drone can complete. If you experience an RTL mid-mission, simply plan a new flight over the missing area
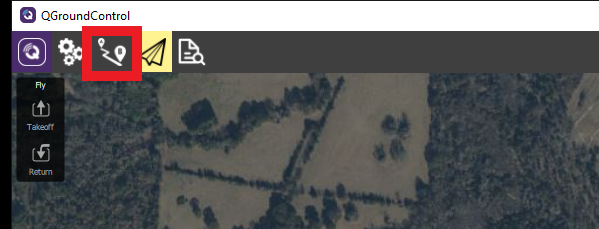
- After opening QGroundControl, select the mission planning tab
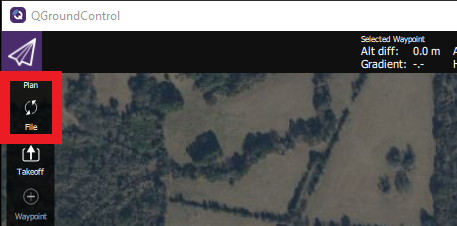
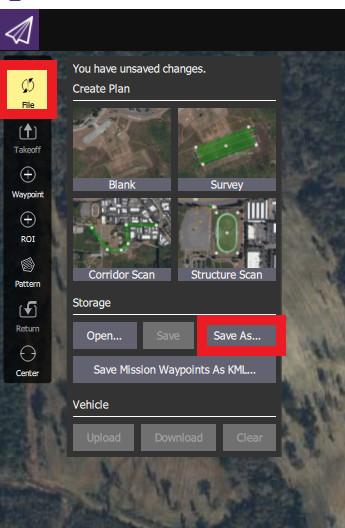
- Select the file button
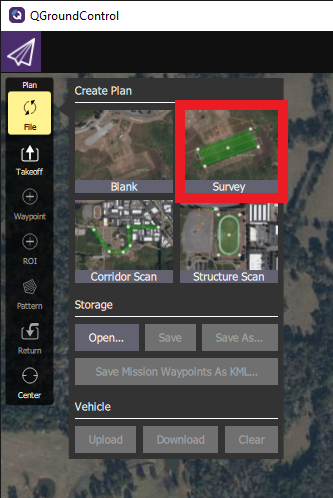
- Select Survey. This will automatically place a Takeoff waypoint
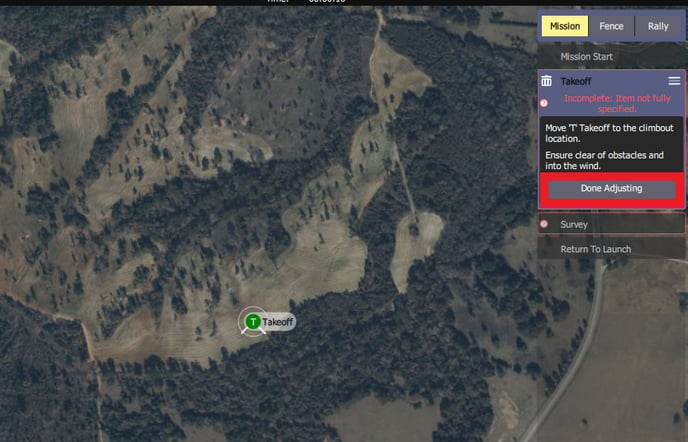
- Drag and drop the takeoff waypoint to your general launch location and select Done Adjusting
- There will be a menu that appears at the top of the screen, select basic

- This will place a rectangular survey shape on the screen
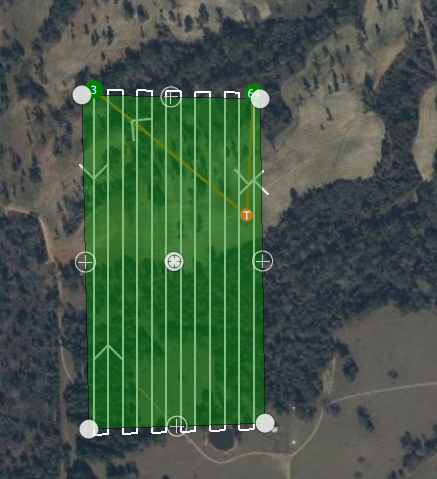
- move the scan area to the desired location and select “Done With Polygon”

- Set your desired Altitude, Trigger Dist, Spacing, Flight Path Angle, Turnaround Distance, and select terrain following if applicable.
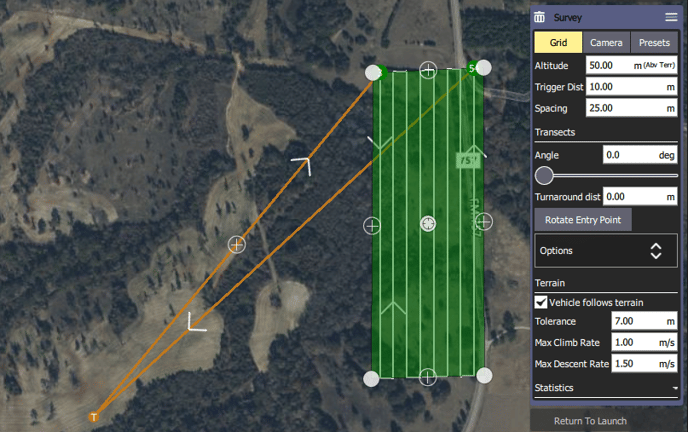
We Recommend Following the parameters laid out in this guide: https://support.smartdrone.us/knowledge/setting-up-flight-parameters-for-lidar-and-rgb-collections-in-different-terrain - We plan for about a 14 minute flight. To get an accurate estimate beforehand, we can move the takeoff point to the first waypoint of the mission.
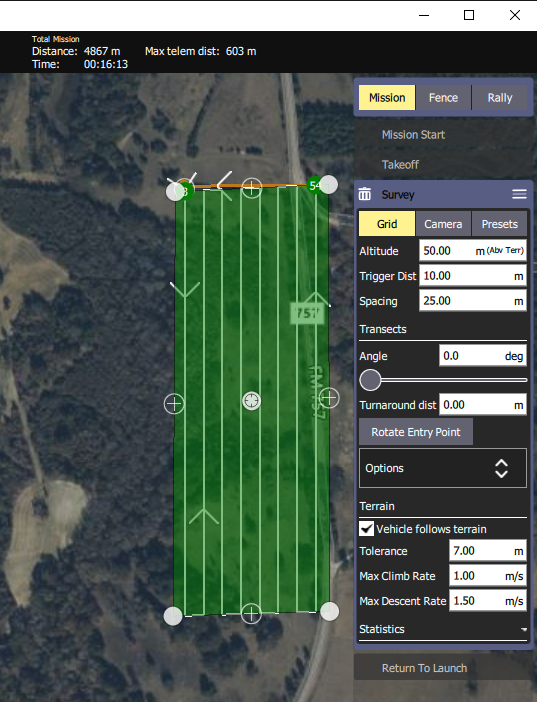
- Looking at the top of the screen, we can see this is a 16+ minute flight. By adjusting the length and width of the mission, we can get this number to 14.

- We can move the takeoff point back to the preferred location and check for one final efficiency item
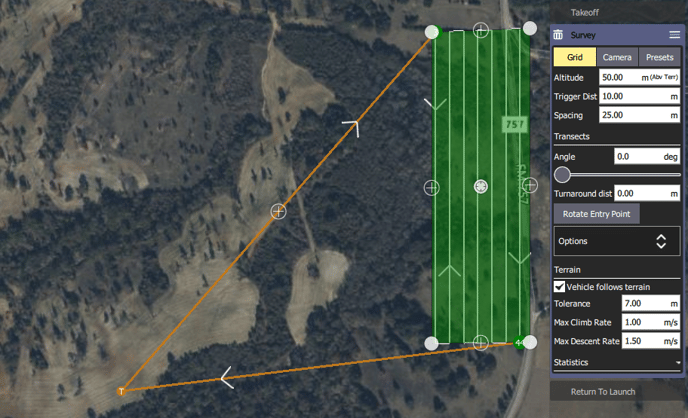
- By selecting the Rotate entry point button, we can make the drone start at the closest corner to the launch location. This will help prevent RTL from happening before the mission is complete.

- By clicking we the file button, and then the Save As button, we can save the file and move to the polygon to the next desired location and save it for that area.
💡 When making the next missions, simply drag the mission (because it is the ideal mission length) and place it next to the location of the mission before it. Then simply rotate entry point if necessary and select “Save As” to save it as the next mission
Be sure to check out our guide on determining the right flight parameters for your needs, so that you can be effective and efficient with Discovery 2!